
This pattern can be used to create simple four-directional player movement using on-screen controls, as might be used for a mobile game.
Previous Tutorials:
- Unity Features
- Conditions
- Actions
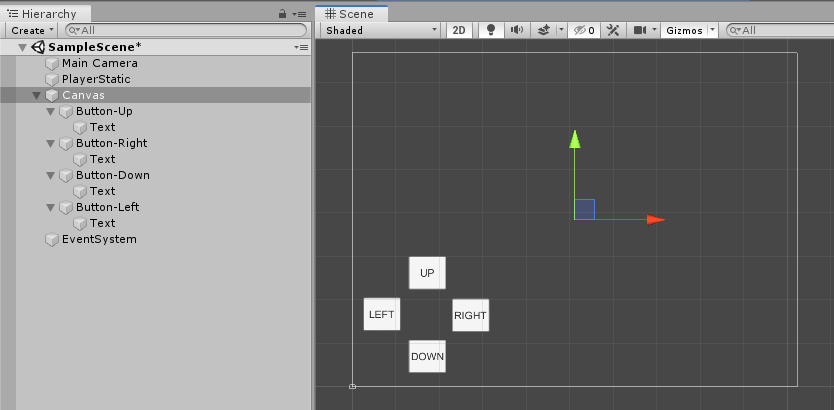
Step 1 – Create the buttons
Create buttons for each of the arrow keys on the User Interface, as shown in the When an on-screen button is pressed… tutorial. Typical these are placed in the lower left area of the screen, but you can place them wherever you like.
For now, just use text to indicate what the button should do. In the future, you should customise these buttons to use icons for up, down, left, and right.
Step 2 – Create a PlayerMovement script
Create a script Using as shown in the Scripting Basics Unity feature tutorial. Name the script PlayerMovement, and open it in Visual Studio.
Step 3 – Create public variable on the script for the movement force setting
Add a public float type variable on the script called forceStrength. This public variable will be visible in Unity so you can edit it in the editor, as shown in the Scripting Basics Unity feature tutorial. We’ll use this variable to control how much the character moves when a button is pressed.


REMINDER
Inspector variables should be placed inside the script’s class (inside the outer curly braces), but outside any functions (like Start() and Update()).
Step 4 – Create a public function on the script for each movement direction.
Create four new public functions on the PlayerMovement script, called MoveUp(), MoveRight(), MoveDown(), and MoveLeft().

Step 5 – In each function, add code to apply a force in that direction
As shown in the …Add a force to a physics object action tutorial, use Unity’s AddForce function to move the player’s RigidBody in the correct direction inside each function.
To make a force in a specific direction, use a directional vector such as Vector2.up (or Vector3 if working in 3D), and multiply the vector by the forceStrength variable we created. This will move the player in that direction with the right amount of force.
See the example below for MoveUp(). You’ll notice we collapsed some of the steps from the …Add a force to a physics object action tutorial into only two lines of code – compare them and see they are still doing the same thing.
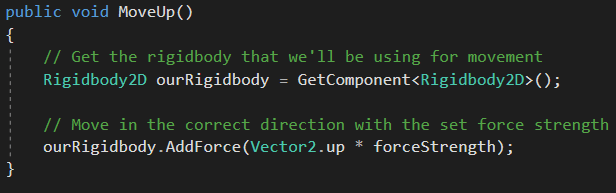
Save your script when you are done.
Step 6 – In Unity, create the Player’s GameObject
Back in Unity, create a GameObject for the player by dragging a sprite or model from the Project Window and into Unity.
Step 7 – Attach the PlayerMovement script and a Rigidbody
Attach the PlayerMovement script to your player’s GameObject, as shown in the Scripting Basics Unity feature tutorial.
You will also need to attach a Rigidbody or Rigidbody2D component, depending on if your game is 3D or 2D. This is shown in the …Add a force to a physics object action tutorial.
Step 8 – Hook up the buttons to the player’s movement functions
As shown in the When an on-screen button is pressed… condition tutorial, you can make code activate when an on-screen button is pressed by simply telling the button what public function on a script to call.
To do this, click on each of the buttons, and drag the player’s GameObject into the slot. From the dropdown, select your PlayerMovement script and then the function that button should call, such as MoveUp(). Make sure to do this for each button, and to select the correct movement function.
Step 9 – Test and Tweak
Press Play in the Unity editor. You should now be able to press the on-screen buttons to move the character. Test it out and tweak the settings such as movementForce on the player’s PlayerMovement script, and the drag on the Rigidbody component, until the movement feels good.
Alternative Design: Press and Hold
Most of the time we actually want to press and hold the button to make our player move, not click a bunch of times. Unfortunately, Unity doesn’t have a way to do this built into its buttons. Instead, we can add another script to do this.
This script is shown below, with an explanation of each section:

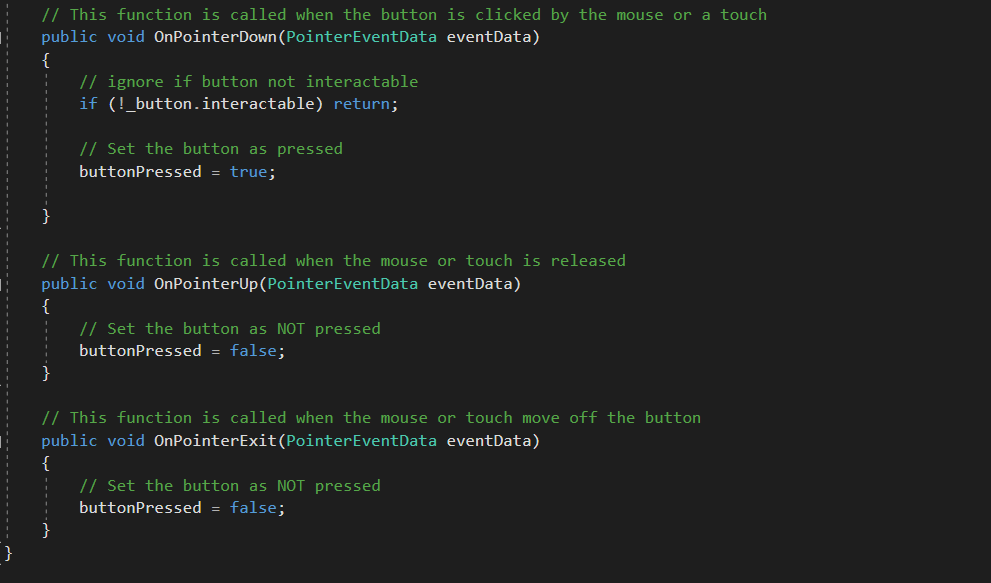
Attach this script to the buttons, and they will now work when held down. Test it and make sure the movement still feels good.
