This condition will perform an Action when an on-screen button is pressed. This can be used to create buttons that link to other scenes, on-screen controls, menus and settings, and more.
Previous Tutorials:
- Unity Features
Step 1 – Create a script for the Action you want to perform.
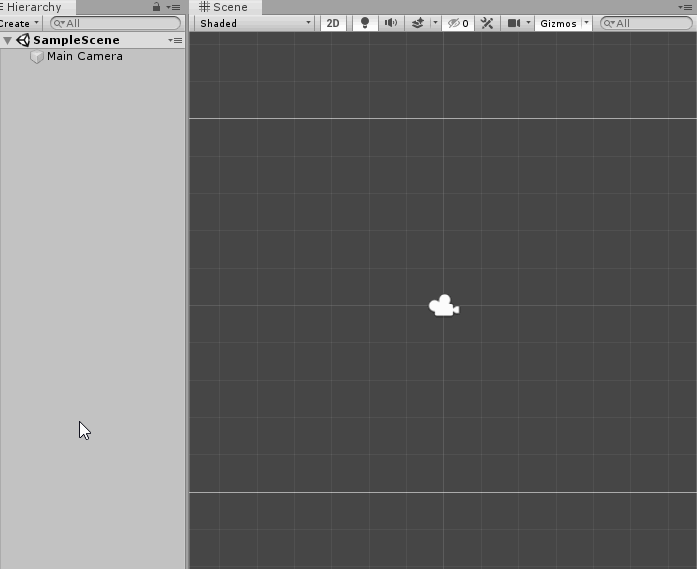
Create a script Using as shown in the Scripting Basics Unity feature tutorial. Name the script PlayerMovement, and open it in Visual Studio.
For this example, we’ll create a very simple script called “TestButtonAction”. You can name your script whatever you like, and can even use an existing script if you want to.

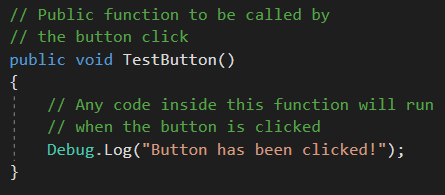
Step 2 – In your Action script, create a public function which will call your action code.
For this example, we’ll call our function “TestButton”, and we’ll use some very simple code to print a debug log. However, you can use any code you want in place of this, and name your function to whatever you like.
Step 3 – Create the User Interface Button
Create a Button using Unity’s User Interface system.
Step 4 – Setup your Button graphics and text
Setup your Button’s graphics and text to match what you are using the Button for.
In this example, we’ll keep the button very simple.

Step 5 – Attach your Action script to a GameObject in the scene.
This can be attached to the Button itself, or to any other GameObject. Just remember that the GameObject will have to already exist in the scene – this won’t work with dynamically spawned GameObjects.
In our example, we’ll just use the Button as the Action GameObject.

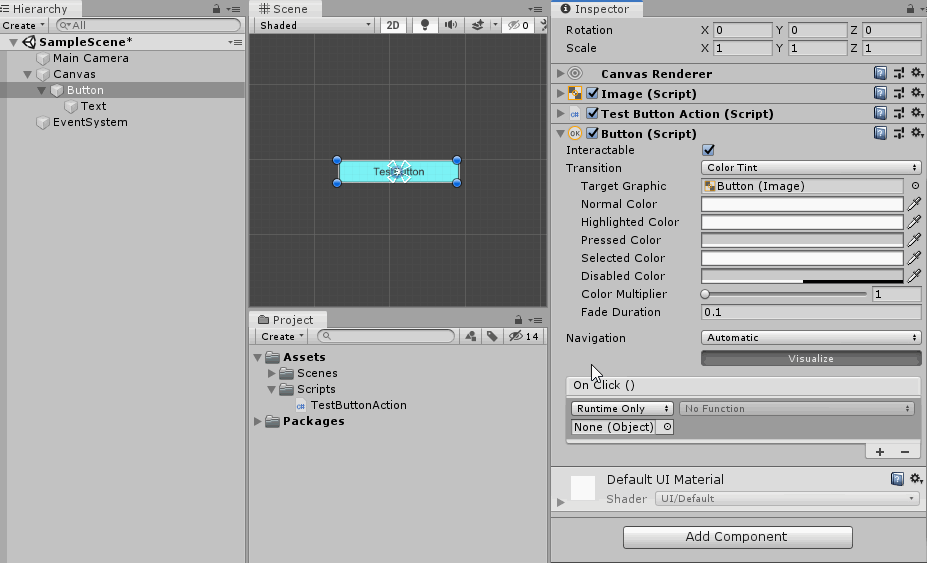
Step 6 – On the Button, add a new entry to the list of OnClick actions
Click on the little + icon in the bottom right of the Button’s On Click () field to add new entries to the list.
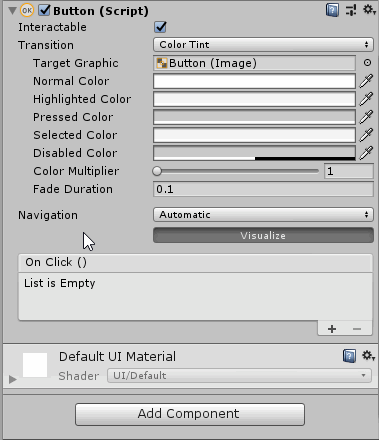
Step 7 – On the Button, drag the GameObject with the Action script attached into the new entry in the OnClick list
In our example, we’ll drag the Button itself into this slot, since that is where our TestButtonAction script is (created in Step 1 and attached in Step 5).

IMPORTANT
You must drag in a GameObject from the scene with the script attached, NOT the script file itself. Remember, a script file can’t do anything on its own – it has to be attached to a GameObject in order to function!
Step 8 – On the Button, select the function for the Action you want to perform
Use the dropdown in the entry you just created to select a function on any component attached to the GameObject. In our example, we’ll select the TestButton() function we created in Step 2, but you can choose any function on the list.

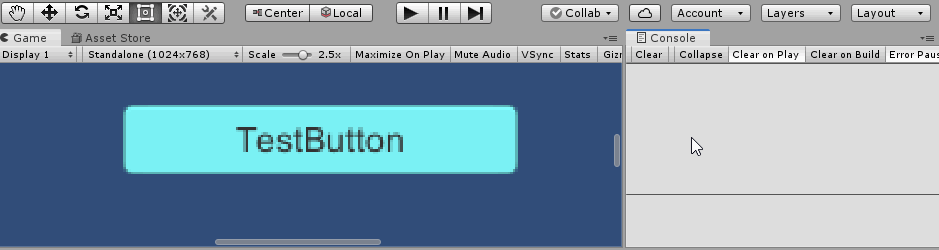
Step 9 – Run the game and test your button
In the example, this means when the button is pressed, a Debug Log should print in the Console window. However, if you have hooked up a different action, whatever action you linked to the button should be performed.