
This tutorial will show you how to export your Unity game to web and upload it to an itch.io webpage.
Previous Steps
- Completed Game
- Itch.io Webpage Setup
Step 1 – Open the Build Settings
From the main menus along the top of the window: File > Build Settings
Step 2 – Choose WebGL from the Platform list
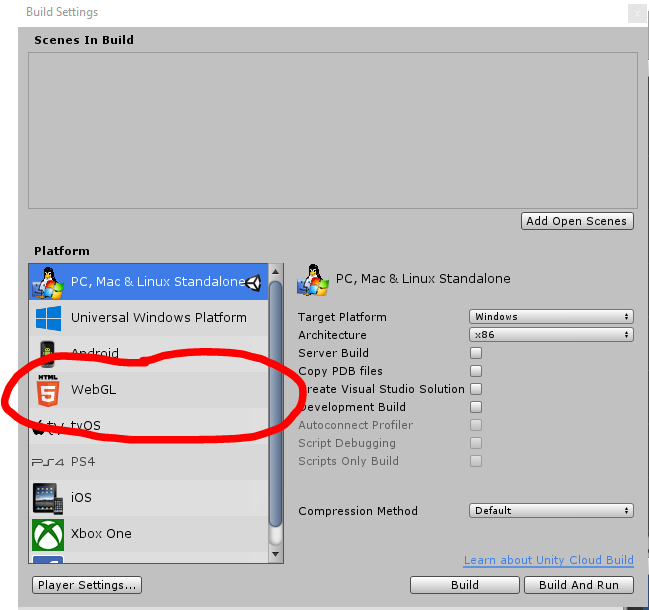
Step 3 – Click “Switch Platform” and wait
This step will take a little while, as all of the game’s assets and scripts will need to be re-imported.
If this button is not available, it means the project is already on this platform and you can skip this step.

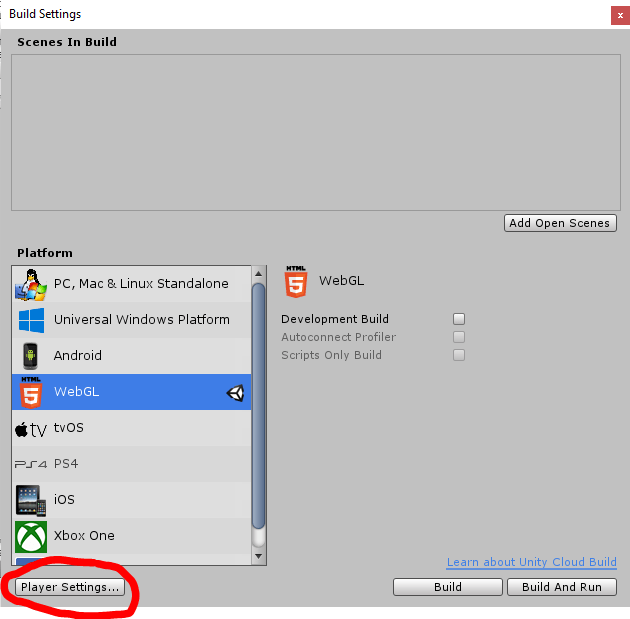
Step 4 – Open Player Settings
Click the button in the lower right to open the Player Settings. This will open another Unity window / tab in your main Unity project window.
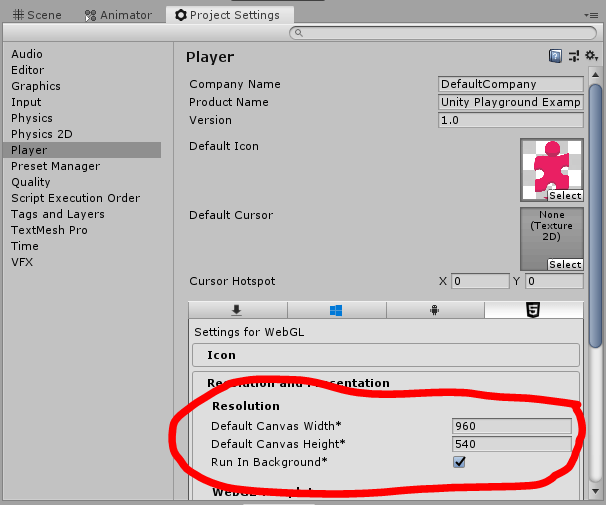
Step 5 – Change the Resolution in the Player Settings
In the Player Settings window, click on “Resolution and Presentation”, then change the “Default Canvas Width” and “Default Canvas Height”.
If you are working in 16:9 aspect ratio, you may wish to use the following values:
Step 6 – Open Build Settings again
From the main menus along the top of the window: File > Build Settings
Step 7 – Ensure all scenes are added to the settings in the correct order
Drag your scene files into the “Scenes In Build” section of the Build Settings. If you have a title screen, it should be first on the list.
Your scene list might look something like this picture, but there may be different.

Step 8 – Click “Build” and Make a new folder for the build, then choose that folder – then wait
When you build the project, it will make several files and folders, so make sure to make a folder specifically for it.
This will take quite some time. A pop up may occur about Node.js, you can simply cancel it.

Step 9 – Zip the Build folder
This is the folder that will be uploaded to itch.io.
Zip it by right-clicking the folder and clicking Send to… > Compressed (zipped) folder
Step 10 – Open your game’s itch.io project page using “Edit game”

Step 11 – Ensure the “Kind of game” setting is set to “HTML”

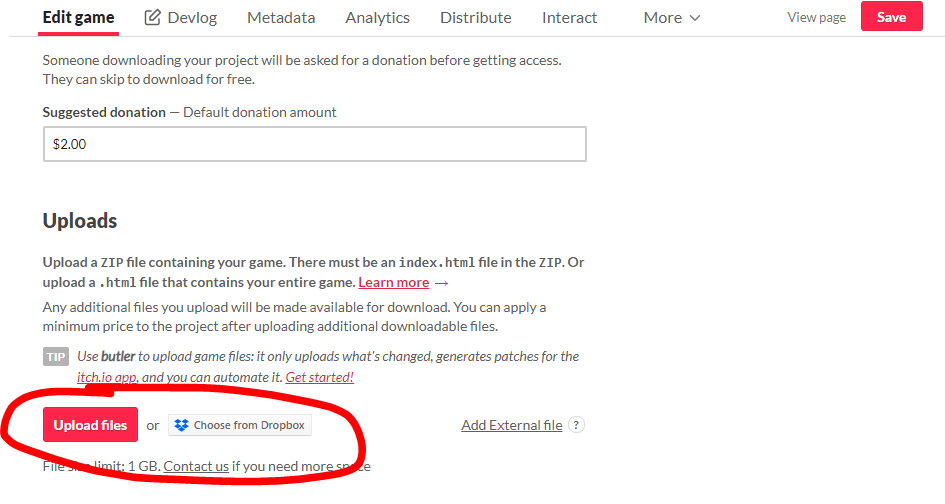
Step 12 – Upload your build
In the Uploads section, click “Upload a file”. Choose your zipped Build file.
Step 13 – Zip your Unity Project
Close Unity (you cannot zip your project with it open).
Find your Unity Project’s folder. Right click the folder and choose Send to… > Compressed (zipped) folder
Step 14 – Upload your Unity Project
Click “Upload Files” to add another file upload to your itch.io project. Upload your zipped Unity Project (not the Build this time)
Step 15 – Change your project upload to be “Source Code”

Step 16 – Set your Embed Options to Auto-detect Size

Step 17 – Set your project to Public
Scroll to the bottom of the page and set the access to Public.

Step 18 – Save your Page and copy the link
When you click “View page” you will be taken to your game’s page. Copy this link to give people access to your game!
